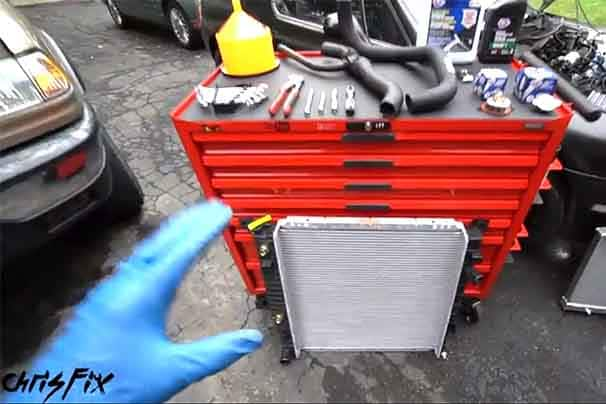
As the heart of your engine's cooling system, the water pump (or more appropriately, coolant pump) circulates coolant through passages in the engine block and cylinder head(s), picking up waste heat from the combustion process. It then delivers the coolant to the radiator, where that heat is dissipated into ambient air, before pulling it back into the engine and starting the process over again.
A failed water pump can result in overheating and a potentially ruined engine, making this a critical component to replace as soon as any symptoms arise.
While many older vehicles had a fairly easy-to-replace water pump that was basically hanging off the front of the engine, the process of water pump replacement on modern vehicles can be more involved. Features like front-wheel drive combine with compact engine compartments to result in the water pump often being difficult to access, sometimes hiding behind timing belt covers or blocked by other under-hood components. That's why technicians or service advisors will often recommend replacing the water pump as well when it's time to replace the timing belt (for those vehicles that still have timing belts; this is not as common as it used to be as most vehicles now have timing chains). Because many of the steps overlap, completing the two jobs together means big savings in labor costs.
Here, we'll be replacing the water pump and associated components on a 2005 MINI Cooper S, but will give tips and tricks along the way that will help you replace the water pump on most modern vehicles.
(For vehicles where the water pump is driven by the timing belt, you should also refer to our guide on replacing the timing belt.)
This is a project that needs some know-how
-
The 2005 MINI Cooper S is a front-wheel-drive vehicle featuring a supercharged 1.6L four-cylinder engine. Driven indirectly by the serpentine belt, the water pump is actually attached to the back of the supercharger, which is sandwiched between the engine and radiator. It's therefore basically impossible to see, much less access, without removing several engine and body components.

Source | Chris Werner
-
After disconnecting the battery, this vehicle requires several components to be removed from the top of the engine, such as the intercooler and air filter assembly. A visual inspection and checking your repair manual will confirm if these steps are necessary for your vehicle.

Source | Chris Werner
-
The MINI Cooper S also requires removal of the front fascia and bumper in order to access the radiator and components at the front of the engine. Here again, a visual inspection and checking your repair manual will confirm if this step is necessary on your car or truck. In most cases it is possible to leave the front fascia and even the radiator in place during your water pump replacement.
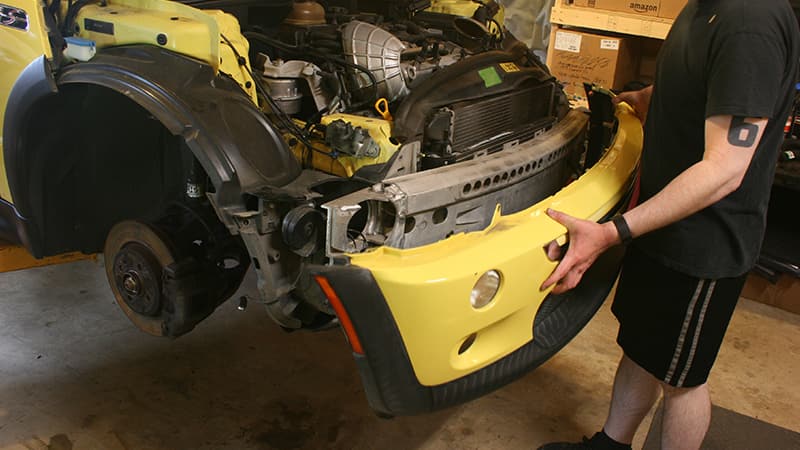
Source | Chris Werner
-
The coolant must be drained from the engine and radiator into a large drain pan. Unless you have an SUV with a lot of ground clearance, now is probably a good time to jack up the vehicle and lower it securely onto jack stands.
First, remove the radiator cap or pressurized coolant tank cap to help ease draining (again, make sure the engine is cool first!). On some vehicles, there are various coolant plugs on the engine and a petcock on the radiator to facilitate this, while on many vehicles this just involves removing the connection between the lower radiator hose and the radiator (as is the case here).
Be careful to avoid spillage as engine coolant is toxic and often attractive to pets and other animals. Be sure to dispose of it properly in accordance with local laws.
(Note: if you happen to have replaced your coolant very recently, it's theoretically possible to reuse it, however care must be taken to keep it clean and filter it of any contaminants before reinstalling.)
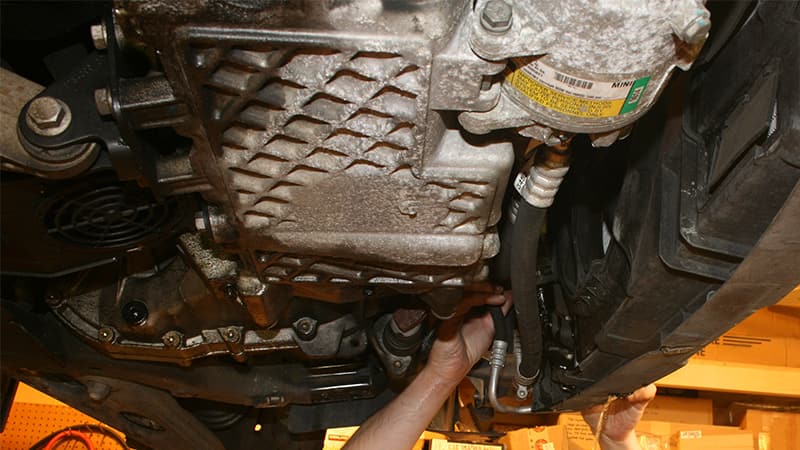
Source | Chris Werner
-
On vehicles requiring removal of the radiator, all coolant hoses can now be detached from the radiator and any bolts securing the radiator to the vehicle removed. Some vehicles require the radiator to be pulled upward and out of the front section of the vehicle, but on this vehicle the front section comes off as an assembly.
Be sure to also disconnect any electrical connections before attempting this step, for example for the cooling fan(s) that may be part of the plastic radiator shroud (this shroud may have to come out before removing the radiator).

Source | Chris Werner
-
Finally, we can see the water pump (finger pointing), but there are several additional components that must be removed before we can access it.
Note how removal of the front section and radiator on this vehicle allows access to not just the water pump, but many other components at the front of the engine such as the alternator.

Source | Chris Werner
-
On this vehicle, one of the radiator hoses connects directly to the water pump (the other connects to the thermostat housing, which is located behind the water pump). While on some applications it is not strictly necessary to remove one or both of these hoses, it is a good idea to replace them at the same time that the water pump is replaced, since over time they can become spongy and prone to failure.

Source | Chris Werner
-
On this vehicle, the housing to which one of the coolant hoses connects holds the thermostat. It's located on the driver side of the cylinder head. Replacing the thermostat at the same time as the water pump is a good idea, as a stuck thermostat can result in the coolant temperature of the engine not being properly regulated.
Fore more on this, read our how-to on replacing the thermostat.
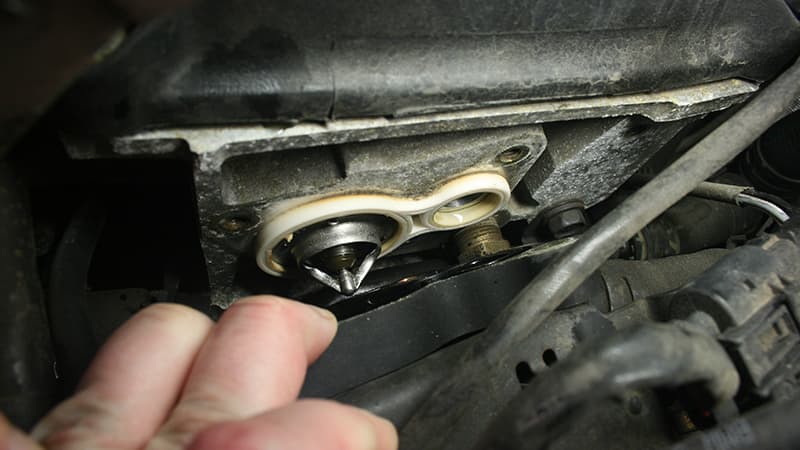
Source | Chris Werner
-
With the coolant hoses removed (as well as the air intake leading to the supercharger and other items unique to this vehicle), the serpentine belt needs to be removed. On some vehicles, this belt drives the water pump directly, but in almost any case it will be in the way and need to be removed. The tension is taken off of the belt using a serpentine belt removal tool (on some vehicles, a simple wrench will suffice) and the belt can be removed.

Source | Chris Werner
-
You'll then get to the last set of components that are preventing the supercharger/water pump assembly from coming off. On this application, these include the alternator, dipstick tube, and serpentine belt tensioner. Again, a visual inspection and checking your repair manual will confirm which items will need to be removed on your vehicle.

Source | Chris Werner
-
The bolts holding the supercharger/water pump assembly are removed and it can finally come off the front of the engine. On almost any vehicle, additional coolant will come out of the engine block when the water pump is removed, so have that drain pan handy.

Source | Chris Werner
-
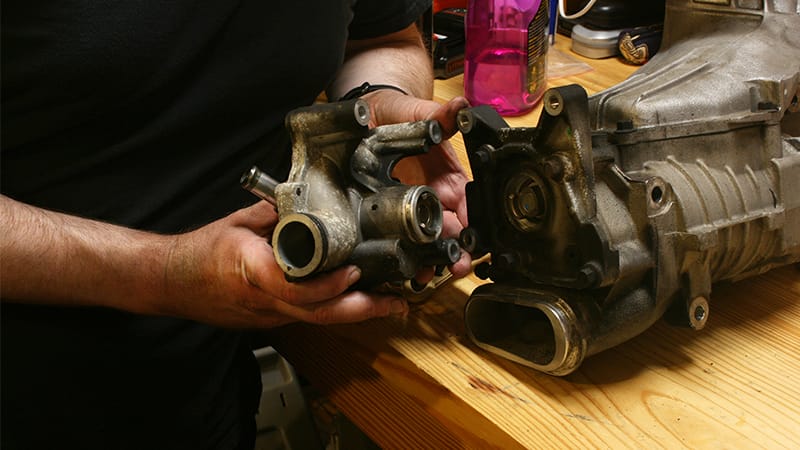
The water pump can now be unbolted from the supercharger. On applications where the water pump is not driven directly by the serpentine or timing belt, there may be a mechanism that drives the water pump. This requires care to be put back together properly. Note any keyways or other such mechanisms when removing the water pump.
Source | Chris Werner
-
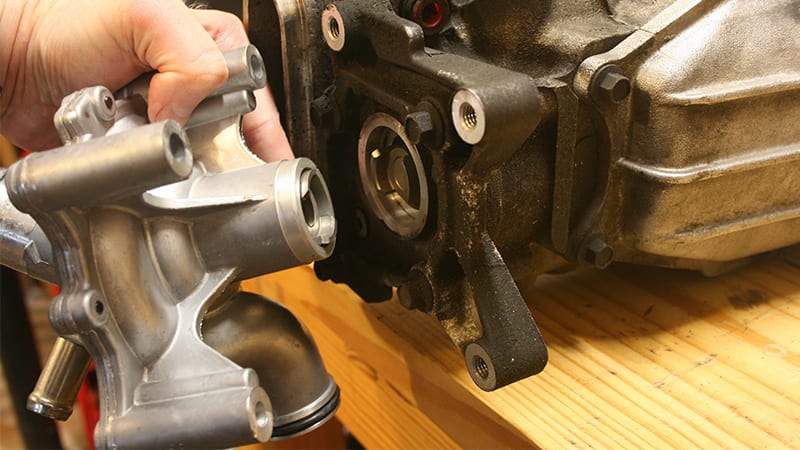
The drive mechanism on the new water pump is aligned with that of the supercharger.
Source | Chris Werner
-
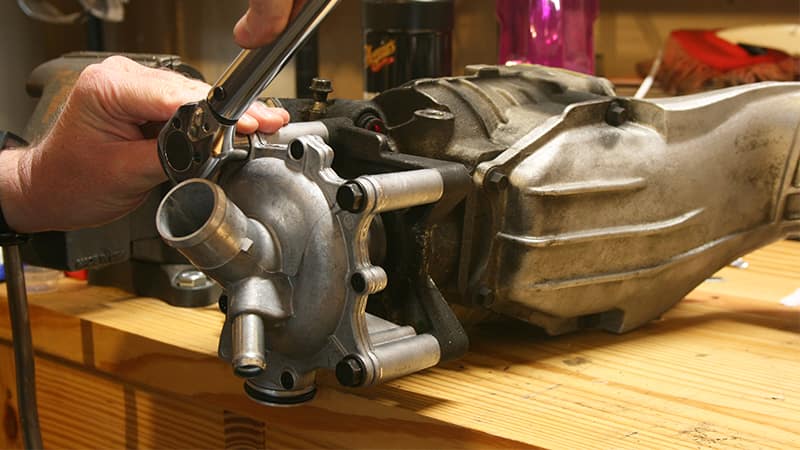
Here and elsewhere, be sure to clean all mating surfaces to remove any leftover gasket material or debris (not necessary on this application due to its use of o-rings). The water pump is attached to the supercharger using the original bolts and using the correct torque. See your repair manual for this torque specification.
Source | Chris Werner
-
Water pump o-rings, if present, may require silicone-based lubricant in order to ensure they are not damaged or moved out of place during installation. Some applications will require new gaskets in lieu of or in addition to o-rings, so check your repair manual and replace these items as appropriate.

Source | Chris Werner
-
Similarly, check the area of the engine block where the water pump will attach to. On this application, a new water pump flange is included which serves as the interface between the water pump and engine block. Be sure to replace these if part of your application and included in your water pump kit.

Source | Chris Werner
-
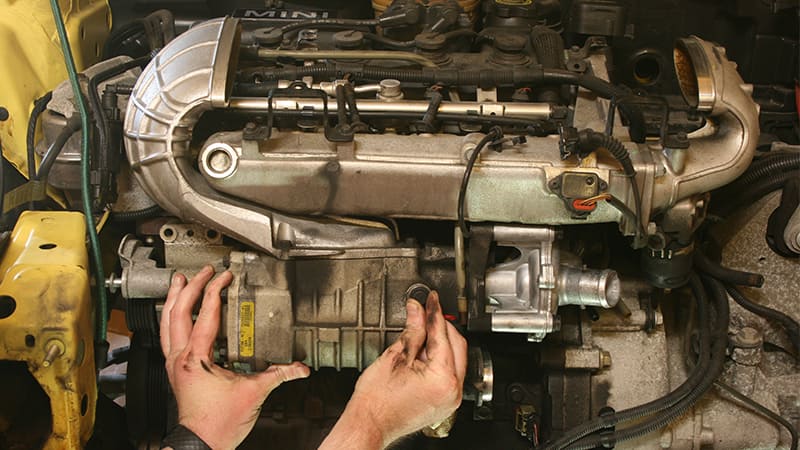
The supercharger/water pump assembly is bolted back on the front of the engine. Assembly of the rest of the components is the reverse of disassembly, though we'll point out a few of the more important items to note.
Source | Chris Werner
-
When reinstalling any belts (such as the serpentine belt) it is generally a good idea to replace with a new one. These belts last much longer than they used to on older cars, but they are a wear item. If there's evidence of wear such as cracking or glazing, definitely replace it.

Source | Chris Werner
-
New radiator hoses are a good purchase for a water pump replacement project, but are not 100% necessary, especially if they've been recently replaced. Sometimes, hose clamps can be reused, but often they are corroded or break upon removal, so be sure to pick up new ones before starting the job, lest you get stuck partway through. If reusing clamps and hoses, be sure to put them on in the same orientation and aligned with any indentations from their previous use.

Source | Chris Werner
-
With all components back together, fresh coolant of the correct type can be added. See your repair manual for the correct type and amount as well as the procedure for filling.
Note that there are many different types of coolant with vastly different properties, even if they appear to have the same color!
-
On some vehicles, bleeder screws (such as this one located in the upper radiator hose assembly) are utilized in order to allow air pockets to escape from the cooling system once the engine is running. Failure to follow this step can result in inadequate cooling to certain parts of the engine, resulting in engine damage or in certain features not working correctly (e.g., the heater).
You should see your service manual for the specifics of how to do this on your particular vehicle, but in essence this involves opening the screws while the engine is running and allowing any air bubbles to escape before closing the screws.

Source | Chris Werner
On vehicles that require removal of the radiator, the A/C condenser may pose a challenge. While many repair manuals will say that the A/C system must be evacuated using specialized tools in order to proceed, often the connections between the condenser and the rest of the A/C system can be left intact and the condenser gently moved out of the way.
Advance Auto Parts offers a variety of loaner tools to help you get your projects done, including a serpentine belt removal tool.
Less mess is better than more mess, right? Try leaving a couple of the water pump bolts loose but mostly threaded in before using some gentle prying to get the water pump loose from the engine block. This will help prevent too much coolant from flowing out of the engine block at once when the water pump finally decides to separate from the block.
After bleeding the system, go for a spin around the block, making sure the temperature gauge in the instrument cluster stays steady and that you have heat. If you have no leaks after returning from your test drive, you've done it! Job well done.


