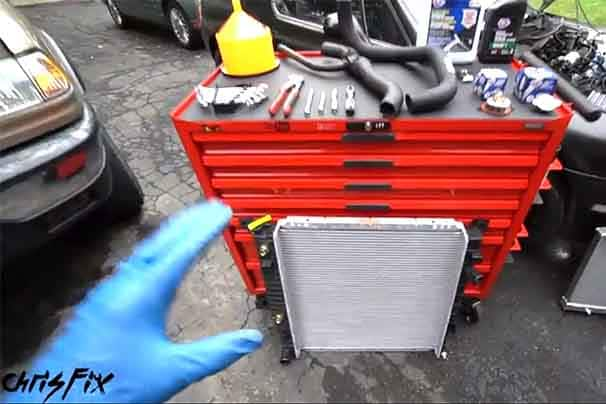
Source | Mike Aguilar
A leaky or plugged radiator will degrade your cooling system's efficiency and risk serious engine damage.
When is A Car Radiator Replacement Necessary?
Worn radiator or heater/bypass hoses can fail suddenly and allow the coolant to spray or gush out. Worn hoses can also develop small leaks that allow coolant to slowly leak out. In the case of a small leak, a stop-leak product might be able to do the trick for you, but they should only be used in an emergency situation, with the repair being completed as soon as possible. This repair should also include a flush. Some newer formulations use powdered copper or aluminum in a liquid suspension that makes its way through the system so the metallic particles can find and plug any pinhole leaks until you can safely make the repair.
Leaks and sludge-filled radiators need to be addressed before they become responsible for serious engine damage, so a car radiator replacement may be necessary.

Carquest Radiator. Source | Advance Auto Parts
Do You Need A New Radiator or Can It Be Repaired?

Source | Mike Aguilar
Whether or not a radiator that's plugged and/or leaking needs to be replaced depends on if it's the type that can be repaired. Brass radiators are soldered together and can be disassembled for cleaning and repair. A radiator shop can "boil" and rod-out this style of radiator to remove scale and corrosion from its internal passages, essentially overhauling it for years of service.
The plastic and aluminum radiators found on most cars can't safely be repaired so they have to be replaced. Tapping on the side or top of the radiator with a wrench or screwdriver will tell you what you have. If you are having trouble figuring out which type of radiator you have, you can also consult your vehicle-specific manual.
Checking for Cooling System Leaks

Source | Mike Aguilar
If you suspect a leak in the radiator and/or hoses but don't see anything obvious Advance Auto Parts has a loaner tool cooling system pressure tester kit that will help you pinpoint the leak. A pressure tester will pressurize the system to normal operating pressure (or a bit more) and will help indicate where leaks are coming from. Follow the instructions on the card to select and install the correct adapter for your cooling system and pressurize the system with the pump. With your safety glasses on, look for drips, drops, or sprays and listen for the hiss of escaping liquid and/or air.
Is a Clogged Radiator Degrading Cooling System Performance?
 Source | Mike Aguilar
A clogged radiator may actually improve your engine's efficiency if you never drive more than a few miles because it'll help your engine get up to operating temperature where the fuel ratio can be leaned out more quickly than a clean radiator due to reduced coolant flow. However, if you regularly drive long distances or sit in traffic a clogged radiator can cause the engine to overheat quickly.
 Source | Mike Aguilar
One way to see if your cooling system has sludge built-up is to remove the reservoir/radiator cap with the engine cool and look at the bottom or the cap. Sludge will build up quickly on the bottom of the cap, especially caps that go directly on the radiator. Also keep this in mind when you're buying a used car, as it's a good indicator of the kind of maintenance the cooling system (and maybe the whole vehicle) has had.
Look into the radiator/reservoir and check the coolant's color. Most coolant should be green or yellow, however check either your owner's manual or the vehicle-specific repair manual for your vehicle to be sure as since the 1990s orange was also used.
If the “radiator cap" goes on the actual radiator, you can drain a little coolant using the petcock valve and look inside the radiator. You should see the small oblong tubes that carry the coolant. If they're plugged, you can try flushing the cooling system to see if that will dislodge the sludge. If it doesn't, you'll need to either have it repaired or replace it.
Are Your Cooling System Hoses Ready for Replacement?
 Source | Mike Aguilar
Worn hoses that aren't detected and replaced quickly tend to “blow" at the most inopportune moments-you're stuck in traffic or on a long trip. Obvious leaks and cracks or bulges are obvious reasons to replace hoses.
 Source | Mike Aguilar
Squeezing the hoses will reveal soft spots in worn hoses that should to be replaced. Let's move on to replacing the radiator and/or worn hoses.
 Left: Motorcraft Radiator Hose Center: Carquest by Dayco Curved Radiator Hose Right: OES Genuine Radiator Hose. Source | Advance Auto Parts
This is a good project for new DIYers
-
The cooling system should be flushed if you're attempting a car radiator replacement and it hasn't been flushed yet. If not, any sludge buildup in the cooling system will end up in the radiator.
-
Slide the drain pan under the radiator petcock (drain) valve and drain the coolant out.

Source | Mike Aguilar
-
Remove the clamp on the lower radiator hose at the radiator using the appropriate tool (Pliers, socket, or screwdriver. This will vary by year, make, and model.). Use a twisting motion to break the seal on the hose and remove the hose. I use a pair of pliers if I can't break the seal by hand.
If you are replacing the upper radiator hose, repeat this process where the hose meets the engine. This will be at the water pump on most rear-wheel-drive vehicles and on the passenger side of most front-wheel-drive vehicles.
When you install the new hoses, check the hose neck for any corrosion, residue or crud and remove it with a wire brush if necessary to ensure a good, positive fit for the new hose. You'll want to do the same for the corresponding hose neck on the intake manifold (for upper hose) or water pump (for lower hose).

Source | Mike Aguilar
-
Repeat Step 3 to remove the upper radiator hose.
-
Owners of most vehicles with manual transmissions can skip this step. Remove the transmission cooling lines. Use rubber or plastic plugs to keep the lines from dripping and draining the transmission.

The wrench on the right is called a flare nut wrench. This is the type of wrench that should be used on transmission cooling or oil cooling line fittings. Source | Mike Aguilar
-
Disconnect any electric fan(s). The connector has a locking mechanism that also varies greatly.
-
Remove the fan shroud on RWD vehicles. Some vehicles may have other pieces of trim or fascia that need to be removed to make access easier.
-
Remove the upper or side support bolt(s). The radiator on most 4-cyl FWD vehicles will be secured by a clamp bolted to the upper support. Larger radiators will either have a cover across the top or be secured by two or three small arms bolted to the upper support or by two bolts on either side of the radiator to the radiator support.

The shroud mounting tab on this Ranger can be seen just the pinky finger. Source | Mike Aguilar
-
Make sure nothing is still attached to the radiator and lift it up and out.
-
Use any fittings, brackets, spacers, or rubber isolators from the old radiator that the new radiator didn't come with. Transfer the electric fan if there is one.

Everything on the old radiator has to be transferred to the new one. Source | Mike Aguilar
-
Lower the new radiator into the engine bay. Be careful to not damage the fins and line up the bottom of the radiator on the lower support. Press the radiator firmly into place and replace the upper support(s) loosely, if you've got cooling lines to attach.
-
Attach the transmission cooling lines, starting them by hand. Tighten them using a flare nut wrench or by tightening the clamps. Tighten the radiator support clamps. On vehicles with manual transmissions, you may get a radiator with the transmission fittings on it. You can still use the radiator, and the attached fittings do not need to be used.
-
Reinstall the fan shroud if necessary. Reattach the electric fan.
-
Replace any worn or rusted clamps as well. Reinstall the upper and lower radiator hoses.

Left: Ideal Hose Clamp-PS #28 Right: Dorman-Help Spring Hose Clamp. Source | Advance Auto Parts
-
Refill the cooling system while looking and listening for leaks.
-
Start the engine and “burp" the cooling system. Many cars have a bleeder valve on the thermostat housing. With the engine running, crack the bleeder valve open and keep it open until only a solid stream of coolant comes out. Close the bleeder and top off the system. Engines without the bleeder will have to be allowed to run for a few minutes until no more bubbles escape at the filler neck.
Once the vehicle has been driven long enough to get up to operating temperature, keep an eye out for any other small leaks that might occur. You may need to slide a piece of cardboard under the radiator, making it easier to see any drips.

Source | Mike Aguilar


