Choose a Store
- Shop All
- Replacement Parts
- Performance Parts
- Accessories
- Oil & Fluids
- Special Offers
- Advance Rewards
- Advice & How-Tos
- Project Guides
Share


How Would You Like To Get This Item?
Store Pickup
Same Day Home Delivery
Home Delivery
Product Information
Product Details
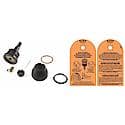
Part No. K90458
Warranty Details (Limited Lifetime Warranty)
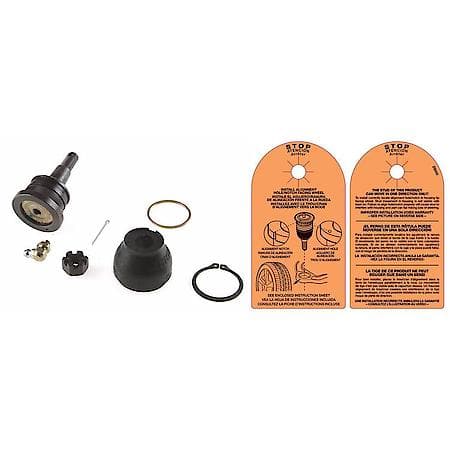
Backed by superior materials and rigorous testing, MOOG ball joints deliver reliable performance you can count on. MOOG problem-solving innovations ensure fast, hassle-free installation.
Product Features:
Product Features:
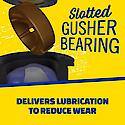
- PROBLEM SOLVER GUSHER BEARING: Metal-to-metal design provides strength and allows grease to flow through bearing surface for reduced friction and long life
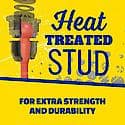
- STRONG AND DURABLE: Ball studs are heat treated to match or exceed OE requirements to inhibit premature failure and improve fatigue strength
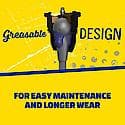
- GREASEABLE SOCKET: Reduces corrosion and wear by allowing new lubricant to flush contaminants
- ABSORBS IMPACT: Belleville preload washer helps keep the bearing package tight as bearings wear
- RESTORES LIKE-NEW STEERING: Patented pressed-in cover plate seals out debris and minimizes looseness, reducing bearing wear and promoting longer life
- EASY TO INSTALL: Precision tolerances for easy installation and steering alignment giving you a perfect fit right out of the box
- COMPREHENSIVE COVERAGE: Available for foreign and domestic nameplates
Specifications
Adjustable:
No
Castle Nut Included:
Yes
Cotter Pin Hole:
Yes
Greaseable:
Yes
Material:
Neoprene
Maximum Outside Diameter:
1.63 in
Mounting Hardware Included:
Yes
Mounting Type:
Press-In
Part Description:
Suspension Ball Joint
5 out of 5
4 Customer Reviews
100% of respondents would recommend this to a friend
Ratings Distribution
5 Stars
4
4 Stars
0
3 Stars
0
2 Stars
0
1 Star
0
Pros
2
Durable
1
High-Performance
1
Greasable
1
Warranty
Cons
1
Boot Ring Difficult
Best Uses
1
Large Cars
1
Small Cars
1
Trucks
Car/Motorcycle Describe yourself
1
Auto Enthusiast
1
Auto Repair Business Owne
1
Mechanic
1
Repair Business Owner
Reviewed by 4 Customers
Quality ball joint as always
Most shops replace the entire control arm at considerably more expense and the ball joints are not greasable. To save my customer some money, I installed what I would consider the best ball joint. I used a ball joint press tool to remove and install them without a problem with the arm still on the car.
As mentioned, you do have to pay attention to the orientation of the ball joint, but you only need to line up the hole in the new part to the dimple on the arm. It should have the ball joint swinging back & forth toward/away from you when facing the arm.
Installing the boot ring is a challenge, but not too bad. Here is what I did and I hope this helps. After the snap ring is installed, take the boot ring and slide it all the way up against the snap ring first. Take a small pocket screw driver and angle it in the dimple where the ring will go. Use a straight pick tool and slide the ring down to get the blade of the screw driver under it. Once the screwdriver is under it, now put on the boot. pull the ring out over the boot lip and slowly turn the boot while using the screwdriver to keep the ring pried out. Eventually, the ring drops in the boot groove all the way around.
Great part and will always use Moog ball joints in my customer's and personal vehicles.
Bottom Line Yes, I would recommend to a friend
good quality
great part/ worked as it should
Bottom Line Yes, I would recommend to a friend
Buy again
Verified Buyer -
Good product
Awesome
Pressed out the old upper ball joints (95 Honda Accord) and pressed in the new Moogs using a hydraulic press. The old ball joints were original components, but they came out with no fuss.
You should note the orientation of the old joints, as a joint's post swivels in a specific line (perpendicular to the car). Also, there is a dimple on the Moog ball joint for alignment with the corresponding dimple on the arm.
The provided spring ring intended to hold the dust boot in place was a bit tricky, but other means could be used if you don't have the patience to make it work.
Displaying Reviews 1 - 5Back to Top
No results
Feedback
Be The First To Know About Deals And Promotions.
Plus, create an account to receive $5 off of $20 or more.
TOP REPLACEMENT PARTS
ROUTINE MAINTENANCE PARTS
CUSTOMER SUPPORT
ABOUT US
PROFESSIONAL SHOPS