20% OFF ONLINE | NO MIN + NEW LOWER PRICES
USE CODE
TRIPREADY
*
Exclusions apply.
Advance Auto Parts Logo
Choose a Store
  • Shop All
  • Replacement Parts
  • Performance Parts
  • Accessories
  • Oil & Fluids
  • Special Offers
  • Advance Rewards
  • Advice & How-Tos
  • Project Guides
  • FAQ / Help Desk
Share
Product thumb
Product thumb
Product main large

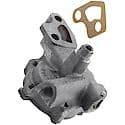
Melling Stock Replacement OE Type Oil Pump

(18 reviews)
Part # M-72
1 year warranty
Loading...
How Would You Like To Get This Item?

Store Pickup

Loading...Loading...Loading...

Same Day Home Delivery

Loading...Loading...Loading...

Home Delivery

Loading...Loading...Loading...
Loading...
Loading...
Loading...Loading...Loading...Loading...Loading...

Product Information

Product Details
Part No. M-72
Warranty Details (1 Year Warranty)
Made in USA. Melling oil pumps provide dependable performance every time in every application. Every Melling oil pump is engineered and assembled to the highest production standards from high quality materials. All Melling oil pumps use the latest in gear and gerotor technology to provide the highest level of quality and performance. Gears are machined to close tolerances to ensure proper engine pressure and correct, efficient pump operation. End plates are precision ground for maximum wear resistance. Every Melling oil pump is individually tested for pressure and flow under conditions designed to duplicate actual engine operating conditions.

Product Features:
  • Manufactured from high quality materials for consistent durable wear
  • Precision engineered for optimum fit and function
  • Designed for long-life and worry-free performance
  • Melling oil pumps are tested for pressure and flow under operating conditions to ensure quality
Specifications
Drive Type:
Drive Shaft

Height:
2.11 in

Mounting Hole Diameter:
0.375 in

Mounting Hole Quantity:
2

Oil Pump Pressure Type:
Standard Pressure

Oil Pump Volume Type:
Standard Volume

Width:
5.91 in
Loading...
Loading...Loading...Loading...Loading...Loading...
4.72 out of 5
18 Customer Reviews
100% of respondents would recommend this to a friend
Ratings Distribution
5 Stars
16
4 Stars
1
3 Stars
0
2 Stars
0
1 Star
1
Pros
1
Durable
1
Easy To Install
1
Perfect Fit
1
Price
1
Price And Availibity
Cons
1
Difficult To Install
1
The Pickup Tube Was Hard
Best Uses
3
Replacement
1
Everyday Driving
1
As a replacement for an oil pump
Describe Yourself
2
Casual Driver
2
Mechanic
1
Auto Enthusiast
Most Liked Positive Review
Works great on my 96 Dodge B3500 Van
Great product! Replaced my old pump and screen as a preventative maintenance while replacing rotted oil pan. The pump replacement is not difficult once you get the oil pan removed which is where the real workout is (see my review on oil pan gasket). But some important tips on pump installation: 1) Hand tighten the new screen in. I counted the number of screen threads left outside of the old pump and tried to match that when tightening the new screen unto new pump. The last rotation was very difficult to do by hand but I managed. I would NOT recommend using any kind of tool to do that as you might bend the screen. Just good ol' active persuasion with hard working set of hands! Also make sure to align the screen position EXACTLY as on the old setup (i.e. bottom of the screen parallel to the bottom of the pump) 2) PRIME THE PUMP! Can't stress this step enough! Very important! Pour some clean oil into the screen and keep turning the hexagon knob with your finger until you see oil shooting out of the pump. Then pour a little bit of oil directly into the pump. 3) Wipe pump's mating surface clean, first with dry rag then with acetone/paint thinner soaked one. Apply liberal but not excessive amount of RTV Silicone to the pump mating surface and adhere the new gasket over it, making sure the holes align properly and no excess silicone got squeezed into the interior of the pump. 4) Install the new pump setup. MAKE ABSOLUTE SURE, the hexagon saddle fits unto the shaft protruding from the block EASILY and SNUGLY WIHTOUT ANY FORCE. If it doesn't align, turn the hexagon with your finger to ensure it does. 5) Align the bolt holes and tighten the 2 bolts snugly but not overtightened. Thats it! As a final word - when you are all done with putting the oil pan&gasket back on, reassembling everything, and pouring fresh oil in - Don't be alarmed when you 1st start the vehicle up and it runs very rough. It will quiet down in a minute or 2 once the new pump gets everything lubricated with oil.
Most Liked Negative Review
Generic
Generic
Reviewed by 18 Customers
Works great on my 96 Dodge B3500 Van
Staff Reviewer -
Great product! Replaced my old pump and screen as a preventative maintenance while replacing rotted oil pan. The pump replacement is not difficult once you get the oil pan removed which is where the real workout is (see my review on oil pan gasket). But some important tips on pump installation: 1) Hand tighten the new screen in. I counted the number of screen threads left outside of the old pump and tried to match that when tightening the new screen unto new pump. The last rotation was very difficult to do by hand but I managed. I would NOT recommend using any kind of tool to do that as you might bend the screen. Just good ol' active persuasion with hard working set of hands! Also make sure to align the screen position EXACTLY as on the old setup (i.e. bottom of the screen parallel to the bottom of the pump) 2) PRIME THE PUMP! Can't stress this step enough! Very important! Pour some clean oil into the screen and keep turning the hexagon knob with your finger until you see oil shooting out of the pump. Then pour a little bit of oil directly into the pump. 3) Wipe pump's mating surface clean, first with dry rag then with acetone/paint thinner soaked one. Apply liberal but not excessive amount of RTV Silicone to the pump mating surface and adhere the new gasket over it, making sure the holes align properly and no excess silicone got squeezed into the interior of the pump. 4) Install the new pump setup. MAKE ABSOLUTE SURE, the hexagon saddle fits unto the shaft protruding from the block EASILY and SNUGLY WIHTOUT ANY FORCE. If it doesn't align, turn the hexagon with your finger to ensure it does. 5) Align the bolt holes and tighten the 2 bolts snugly but not overtightened. Thats it! As a final word - when you are all done with putting the oil pan&gasket back on, reassembling everything, and pouring fresh oil in - Don't be alarmed when you 1st start the vehicle up and it runs very rough. It will quiet down in a minute or 2 once the new pump gets everything lubricated with oil.
Bottom Line Yes, I would recommend to a friend
easy to install
Staff Reviewer -
replaced nonfunctual oil pump
Bottom Line Yes, I would recommend to a friend
Pumps oil
Verified Buyer -
Started getting a low oil pressure warning light while at idle on my '97 Dodge Ram. Swapped out the pump and everything works. No more low oil pressure issues. Installation was straight-forward.
Working good ..
Verified Buyer -
Works as it should...
works
Verified Buyer -
worked fine
Displaying Reviews 1 - 5Back to Top
Loading...
Loading...Loading...Loading...Loading...Loading...
No results
Loading...
Loading...Loading...Loading...Loading...Loading...
Feedback
Be The First To Know About Deals And Promotions.
Plus, create an account to receive $5 off of $20 or more.
TOP REPLACEMENT PARTS
Brake Pads & Shoes
Brake Rotors
Alternators
Water Pumps
Starters
Brake Calipers

Order Lookup

Help Desk

Store Locator

In Store Services

Mobile App

CUSTOMER SUPPORT
Accessibility Statement
Contact Us
Forgot Password
Help Desk
In Store Pickup
In Store Services
Order Tracking
Recall Information
Return Policy
Same Day Delivery
© 2026 Advance Auto Parts
Privacy Policy
Terms of Use
Site Map
ADVANCING A WORLD IN MOTION®