The Chevrolet Silverado is a great truck, sells in huge numbers, offers options for nearly every driver, and has impressive durability credentials. All that said, the Silverado does develop some common issues as it ages. If you're buying used, or taking care of an older vehicle, here's everything to watch out for on Chevy's full-size truck.
The Silverado replaced the Chevy C/K trucks for 1999, and the new truck continued the sales success, averaging more than 800,000 units per year for the Silverado and GMC Sierra combined. That means there's ton of trucks available on the used market. They're a great value too, introducing the LS-based engines in GM trucks, the over-built Alison 1000 transmissions, and a variety of neat sub-models like the Silverado SS. It's also one of the vehicles most likely to reach 200,000 miles. We'll mainly look at the first-generation (1999 – 2007) and second-gen (2007 – 2014) Silverado here, as those trucks are the oldest and their problems as they age are well known. If you're shopping for a used truck, or are just looking to maintain yours, here's what to look for.

1999 Silverado | Chevrolet Media
Fuel Pump
The Vortec 4.8, 5.3, and 6.0 V8 engines commonly see a fuel pump failure symptom where the engine cranks, but won't start. Other signs are it suddenly dies while driving, sputtering, or poor performance.
Unfortunately, replacing a Silverado's fuel pump is more difficult than in a car like a Camaro, because you need to remove the cargo bed and have access to the fuel pump. You can go the usual route and drop the fuel tank, but that actually takes longer than removing the bed. By the way, the “bed tilt" method you see on YouTube is only for Austin Powers types that “also like to live dangerously." That heavy bed could slam down on you with no warning.
Before you replace the fuel pump, aim for the least amount of gas possible in the tank, as it makes the job easier. In the fuse box, pull the F/PMP relay. Remove the tailgate to reduce weight. Use a small flathead screwdriver to unplug the tail light wiring, located on top of the spare tire well. Then remove the screws around the filler cap, and finally the eight 18mm bolts holding the bed to the frame. You'll want four people for lifting the bed off. Then the fuel pump is easily located on top of the fuel tank, right behind the cab. Use large tongue-and-groove style pliers to remove the lock collar securing the pump assembly to the tank. Remove the fuel lines, then rotate the pump and it will lift out in one long unit.
Fuel Filter
Before you do the hard work, remember that the fuel filter could be at fault here, too. A failing fuel filter delivers pretty much the same symptoms as a failing fuel pump, with bonuses for being much easier and cheaper to replace. The Silverado owner's manual doesn't have a maintenance schedule for the fuel filter, but plan on two years/30,000 miles for a healthy fuel pump.
Open the gas cap and start the truck, then pull fuel pump relay in fuse box and let the engine run until it shuts off. Turn the key to off, and disconnect the battery. The fuel filter is on the bottom of the Silverado, bolted to the frame, approximately under the driver's seat. Use a 13/16 wrench to hold it in place, and a 5/8 line wrench to loosen the nut.
Use a line wrench so you don't round off the nut.
Slide the old fuel filter out of the bracket. Slide the new filter in, making sure the flow arrow points towards the engine.

1999 Silverado | Chevrolet Media
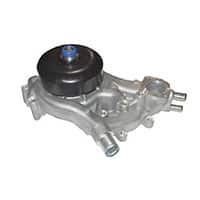
Water Pump
There are a few common signs of a failing water pump. You might have coolant leaking from the pump and a low coolant level, or a growling or whining sound from the engine. On a Silverado, owners report a failing water pump as usually a puddle of coolant after the truck has sat for a few hours, strong coolant smell in the cabin, and a coolant warning light on the instrument cluster.
Replacing a water pump is an intermediate level task and takes a few hours, but it's a manageable job for wrenchers with some experience and patience. Check the overview guide on how to replace a water pump, but know the Silverado has a few extra steps. The Silverado's water pump is buried under engine accessories, located just above the crank pulley.
You'll need a new water pump, and gaskets, but skip the sealant as the Silverado factory service manual specifically says not to use any kind of sealant on the gasket. Torque is critical here, as you can cause a leak by getting it wrong. Buy a torque wrench if you don't already have one, and tighten the water pump bolts to 11 lb-ft on the first pass, then hit them all a second time to 22 lb-ft. Since you're at it, and half the coolant is gone, have a look at a proper cooling system flush.
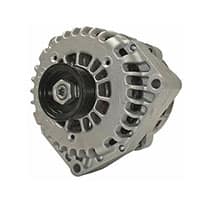
Alternator
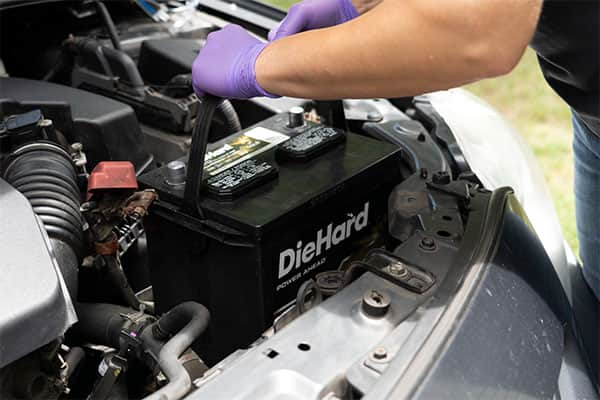
A vehicle's alternator is a wear part, meant to be replaced after several years of service. Silverado owners report the most common sign of a failing alternator is flickering headlights, until total failure when the truck fails to start, or it dies while driving. If you have these symptoms, first rule out a bad battery before looking into the charging system. Remember, battery testing is one of the free services we offer at your nearest Advance Auto Parts store!
If you have the 4.8, 5.3, or 6.0 V8 engine, you're in luck, as the alternator sits on the top driver's side of the engine and is easily replaced. If you have a 4.3 V6, your alternator is also on top, but on the passenger's side. Step one is to disconnect the battery. Then use an 8mm socket to remove the gigantic Vortec engine cover, if you haven't already thrown that in the trash. Then remove the factory air box (and replace it with a cold air intake) by using a flathead screwdriver on the clamps. Two more 8mm bolts secure the plastic valve covers, and then you can get to the alternator. First remove the serpentine belt off the pulley by using a 15mm socket on the tensioner, pull up, and slip off the belt. Pull off the two electrical connectors at the back, then remove the rubber boot and disconnect the battery cable with a 10mm wrench or socket. The two bolts on the front of the alternator bracket need the 15mm again, and should come out easily. Installation is extremely easy, just ensure the alternator bracket bolts are torqued to 37 lb-ft.

2007 Silverado | Chevrolet Media
Brake Calipers
With the age of the first- and second-gen Silverado, it's no wonder they need new calipers by this point. The factory brake pads were (hopefully) tossed years ago, and now it's time for the factory calipers to meet the recycling bin. Just like changing brake pads, changing the caliper is a simple process and easy enough for a beginner. The Silverado doesn't have any special instructions here, so it's basically jack up your truck, remove the wheel, disconnect the brake hose, pull caliper guide pins, and remove the caliper. On reassembly, the somewhat delicate bleeder valve only gets 10 lb-ft of torque. The brake line-to-caliper bolt is 30 lb-ft, and the 18mm caliper bracket nuts each get 210 lb-ft. Air tools are your friend.
Be sure to bleed the brake system when you're done.
If you have an early Silverado, here's an opportunity for an affordable OEM brake upgrade. Up through 2005, Silverado brake rotors are 12-inch diameter up front. That's not a lot of braking surface area for a full-size truck. Fortunately, GM realized this and added 13" rotors for 2006. If you have a 1999 – 2005 Silverado, purchase the brake pads, rotors, calipers, and brackets for a 2006 or -07 (this applies to Tahoe as well), and they'll bolt right on for improved stopping power.
Front wheel bearing and Hub
This is the number one Silverado issue at Consumer Reports, with owners needing to replace the wheel bearing/hub more often than average. Early Silverados had rust issues in/near the hubs, so that's a likely culprit as to why they prematurely fail. Chevy guys still get to make fun of Dodge owners for the Ram's notorious ball joint issues, but this one is nearly as bad. Owners report that the Silverado usually displays an ABS warning light with a growling/grinding noise as the early symptoms of a failing wheel bearing. Other common signs include tire wear on only one side of the tire, and wobbly wheels when the vehicle is raised off the ground. Note that the Silverado's hubs are sealed units, so you can't be a cheapo and just replace a bearing.
To start, jack up your truck, use jack stands, remove the wheel, and the remove the caliper (see above). Then pull the brake rotor and disconnect the ABS sensor. You'll want a good impact wrench to remove the hub nut, as the factory workers apparently use their professional tools on max settings because they think it's funny. Your arms and a short ratchet makes for a bad day, so at a minimum use a breaker bar. Then back to your regular ratchet for the three bolts on the back side of the knuckle. Finally, take a hammer to the backside and the hub comes free. When reassembling, the three knuckle bolts get 133 lb-ft, while the main axle nut needs 177 lb-ft.
4WD Position Switch
Owner forums list the Silverado's most common problem as a failing 4WD position sensor switch. This one is easy and affordable to fix, and fairly obvious when it needs replaced. When you start your Silverado, here's your sign: the truck will automatically switch to/from 4WD, and you'll be unable to change the selection. It's not dangerous, but it's inconvenient and locked 4WD uses more gas.
To fix this you'll need a new switch and some trim tools. Tilt the steering wheel down, then pop off the plastic trim surrounding the switch and the dash gauges, pulling it forward until it clears the steering column. Use the trim tools on the switch's plastic tabs and pry the switch out of the dash. Then just disconnect the two electrical connections at the back. To install the new switch, attach the electrical connections (they only go on one way), press the switch into place until the tabs click, and reattach the surrounding trim.
What are your thoughts on the Chevy Silverado? Do you own one or use it for work? Let us know your Silverado advice in the comments below.


